转自:https://www.cnblogs.com/axzxs2001/p/7482771.html
在asp.net core中,微软提供了基于认证(Authentication)和授权(Authorization)的方式,来实现权限管理的,本篇博文,介绍基于固定角色的权限管理和自定义角色权限管理,本文内容,更适合传统行业的BS应用,而非互联网应用。
在asp.net core中,我们认证(Authentication)通常是在Login的Post Action中进行用户名或密码来验证用户是否正确,如果通过验证,即该用户就会获得一个或几个特定的角色,通过ClaimTypes.Role来存储角色,从而当一个请求到达时,用这个角色和Controller或Action上加的特性 [Authorize(Roles = “admin,system”)]来授权是否有权访问该Action。本文中的自定义角色,会把验证放在中间件中进行处理。
一、固定角色:
即把角色与具体的Controller或Action直接关联起来,整个系统中的角色是固定的,每种角色可以访问那些Controller或Action也是固定的,这做法比较适合小型项目,角色分工非常明确的项目。
项目代码:
https://github.com/axzxs2001/Asp.NetCoreExperiment/tree/master/Asp.NetCoreExperiment/%E6%9D%83%E9%99%90%E7%AE%A1%E7%90%86/RolePrivilegeManagement
始于startup.cs
需要在ConfigureServices中注入Cookie的相关信息,options是CookieAuthenticationOptions,关于这个类型提供如下属性,可参考:https://docs.microsoft.com/en-us/aspnet/core/security/authentication/cookie?tabs=aspnetcore2x
它提供了登录的一些信息,或登录生成Cookie的一些信息,用以后
1
2
3
4
5
6
7
8
9
10
11
12
13
14
15
16
17
18
19
20
21
22
23
24
25
26
27
28
29
30
31
32
33
public void ConfigureServices (IServiceCollection services ){ services.AddMvc(); services.AddAuthentication(CookieAuthenticationDefaults.AuthenticationScheme) .AddCookie(options => { options.LoginPath = new PathString("/login" ); options.AccessDeniedPath = new PathString("/denied" ); }); } public void Configure (IApplicationBuilder app, IHostingEnvironment env ){ if (env.IsDevelopment()) { app.UseDeveloperExceptionPage(); app.UseBrowserLink(); } else { app.UseExceptionHandler("/Home/Error" ); } app.UseStaticFiles(); app.UseAuthentication(); app.UseMvc(routes => { routes.MapRoute( name: "default" , template: "{controller=Home}/{action=Index}/{id?}" ); }); }
HomeController.cs
对于Login Get的Action,把returnUrl用户想要访问的地址(有可能用户记录下想要访问的url了,但系统会转到登录页,登录成功后直接跳转到想要访问的returnUrl页)
对于Login Post的Action,验证用户密和密码,成功能,定义一个ClaimsIdentity,把用户名和角色,和用户姓名的声明都添回进来(这个角色,就是用来验证可访问action的角色 )作来该用户标识,接下来调用HttpContext.SignInAsync进行登录,注意此方法的第一个参数,必需与StartUp.cs中services.AddAuthentication的参数相同,AddAuthentication是设置登录,SigninAsync是按设置参数进行登录
对于Logout Get的Action,是退出登录
HomeController上的[Authorize(Roles=”admin,system”)]角色和权限的关系时,所有Action只有admin和system两个角色能访问到,About上的[Authorize(Roles=”admin”)]声明这个action只能admin角色访问,Contact上的[Authorize(Roles=”system”)]声明这个action只能system角色访问,如果action上声明的是[AllowAnomymous],说明不受授权管理,可以直接访问。
1
2
3
4
5
6
7
8
9
10
11
12
13
14
15
16
17
18
19
20
21
22
23
24
25
26
27
28
29
30
31
32
33
34
35
36
37
38
39
40
41
42
43
44
45
46
47
48
49
50
51
52
53
54
55
56
57
58
59
60
61
62
63
64
65
66
67
68
69
70
71
72
73
74
75
76
77
78
79
80
81
82
83
84
85
86
87
88
89
90
91
92
93
94
using System;using System.Collections.Generic;using System.Diagnostics;using System.Linq;using System.Threading.Tasks;using Microsoft.AspNetCore.Mvc;using RolePrivilegeManagement.Models;using System.Security.Claims;using Microsoft.AspNetCore.Authentication;using Microsoft.AspNetCore.Authentication.Cookies;using Microsoft.AspNetCore.Authorization;namespace RolePrivilegeManagement.Controllers { [Authorize(Roles = "admin,system" ) ] public class HomeController : Controller { public IActionResult Index () { return View(); } [Authorize(Roles = "admin" ) ] public IActionResult About () { ViewData["Message" ] = "Your application description page." ; return View(); } [Authorize(Roles = "system" ) ] public IActionResult Contact () { ViewData["Message" ] = "Your contact page." ; return View(); } public IActionResult Error () { return View(new ErrorViewModel { RequestId = Activity.Current?.Id ?? HttpContext.TraceIdentifier }); } [AllowAnonymous ] [HttpGet("login" ) ] public IActionResult Login (string returnUrl = null { TempData["returnUrl" ] = returnUrl; return View(); } [AllowAnonymous ] [HttpPost("login" ) ] public async Task<IActionResult> Login (string userName, string password, string returnUrl = null { var list = new List<dynamic > { new { UserName = "gsw" , Password = "111111" , Role = "admin" }, new { UserName = "aaa" , Password = "222222" , Role = "system" } }; var user = list.SingleOrDefault(s => s.UserName == userName && s.Password == password); if (user!=null ) { var identity = new ClaimsIdentity(CookieAuthenticationDefaults.AuthenticationScheme); identity.AddClaim(new Claim(ClaimTypes.Sid, userName)); identity.AddClaim(new Claim(ClaimTypes.Name, user.Name)); identity.AddClaim(new Claim(ClaimTypes.Role, user.Role)); await HttpContext.SignInAsync(CookieAuthenticationDefaults.AuthenticationScheme, new ClaimsPrincipal(identity)); if (returnUrl == null ) { returnUrl = TempData["returnUrl" ]?.ToString(); } if (returnUrl != null ) { return Redirect(returnUrl); } else { return RedirectToAction(nameof (HomeController.Index), "Home" ); } } else { const string badUserNameOrPasswordMessage = "用户名或密码错误!" ; return BadRequest(badUserNameOrPasswordMessage); } } [HttpGet("logout" ) ] public async Task<IActionResult> Logout () { await HttpContext.SignOutAsync(CookieAuthenticationDefaults.AuthenticationScheme); return RedirectToAction("Index" , "Home" ); } [AllowAnonymous ] [HttpGet("denied" ) ] public IActionResult Denied () { return View(); } } }
前端_Layout.cshtml布局页,在登录成功后的任何页面都可以用@User.Identity.Name就可以获取用户姓名,同时用@User.Claims.SingleOrDefault(s=>s.Type== System.Security.Claims.ClaimTypes.Sid).Value可以获取用户名或角色。
1
2
3
4
5
6
7
8
9
10
11
12
13
14
15
16
17
18
19
20
21
22
23
24
25
26
27
28
29
30
<nav class ="navbar navbar-inverse navbar-fixed-top" > <div class ="container" > <div class ="navbar-header" > <button type="button" class ="navbar-toggle" data-toggle="collapse" data-target=".navbar-collapse" > <span class ="sr-only" >Toggle navigation</span> <span class ="icon-bar" ></span> <span class ="icon-bar" ></span> <span class ="icon-bar" ></span> </button> <a asp-area="" asp-controller="Home" asp-action="Index" class ="navbar-brand" >RolePrivilegeManagement</a> </div> <div class ="navbar-collapse collapse" > <ul class ="nav navbar-nav" > <li><a asp-area="" asp-controller="Home" asp-action="Index" >Home</a></li> <li><a asp-area="" asp-controller="Home" asp-action="About" >About</a></li> <li><a asp-area="" asp-controller="Home" asp-action="Contact" >Contact</a></li> </ul> <ul class ="" style="float:right; margin:0;" > <li style="overflow:hidden;" > <div style="float:left;line-height:50px;margin-right:10px;" > <span style="color:#ffffff" >当前用户:@User.Identity.Name</span> </div> <div style="float:left;line-height:50px;" > <a asp-area="" asp-controller="Home" asp-action="Logout" >注销</a> </div> </li> </ul> </div> </div> </nav>
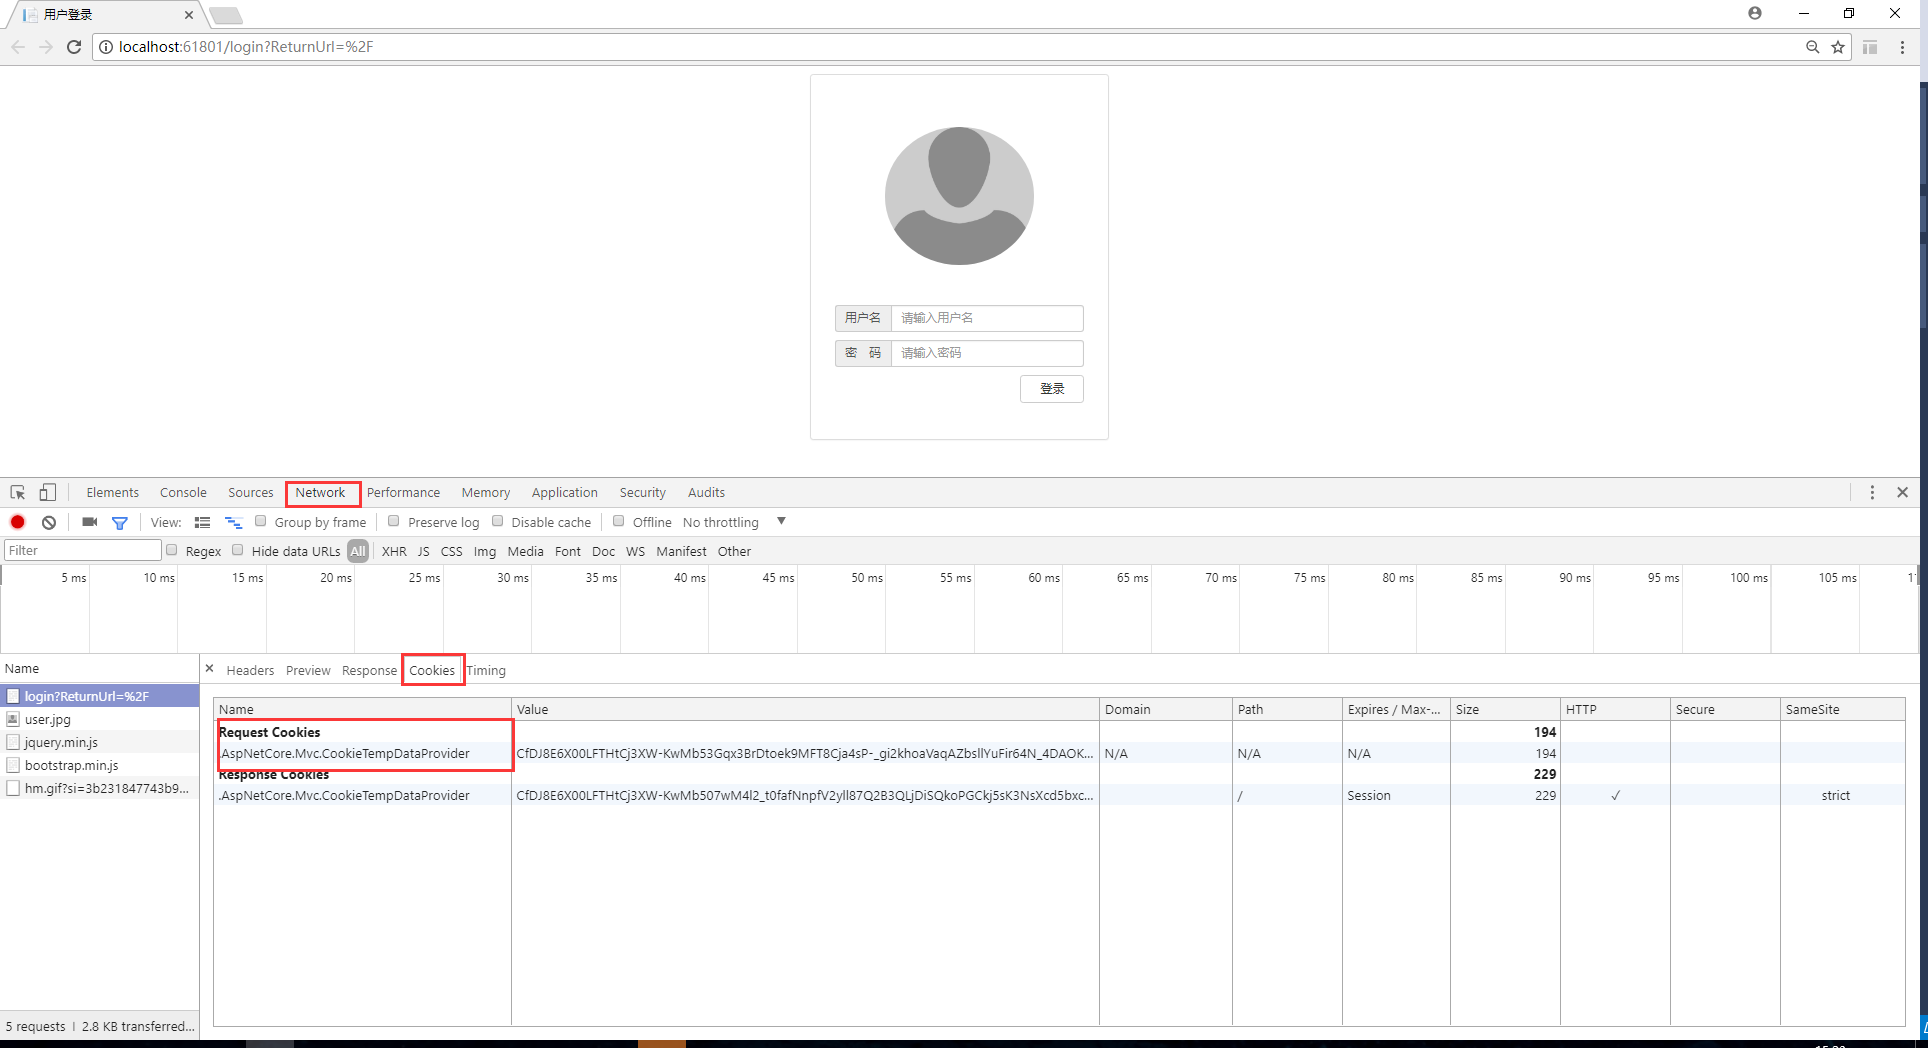
现在可以用chrome运行了,进行登录页后F12,查看Network—Cookies,可以看到有一个Cookie,这个是记录returnUrl的Cookie,是否记得HomeController.cs中的Login Get的Action中代码:TempData[“returnUrl”] = returnUrl;这个TempData最后转成了一个Cookie返回到客户端了,如下图:
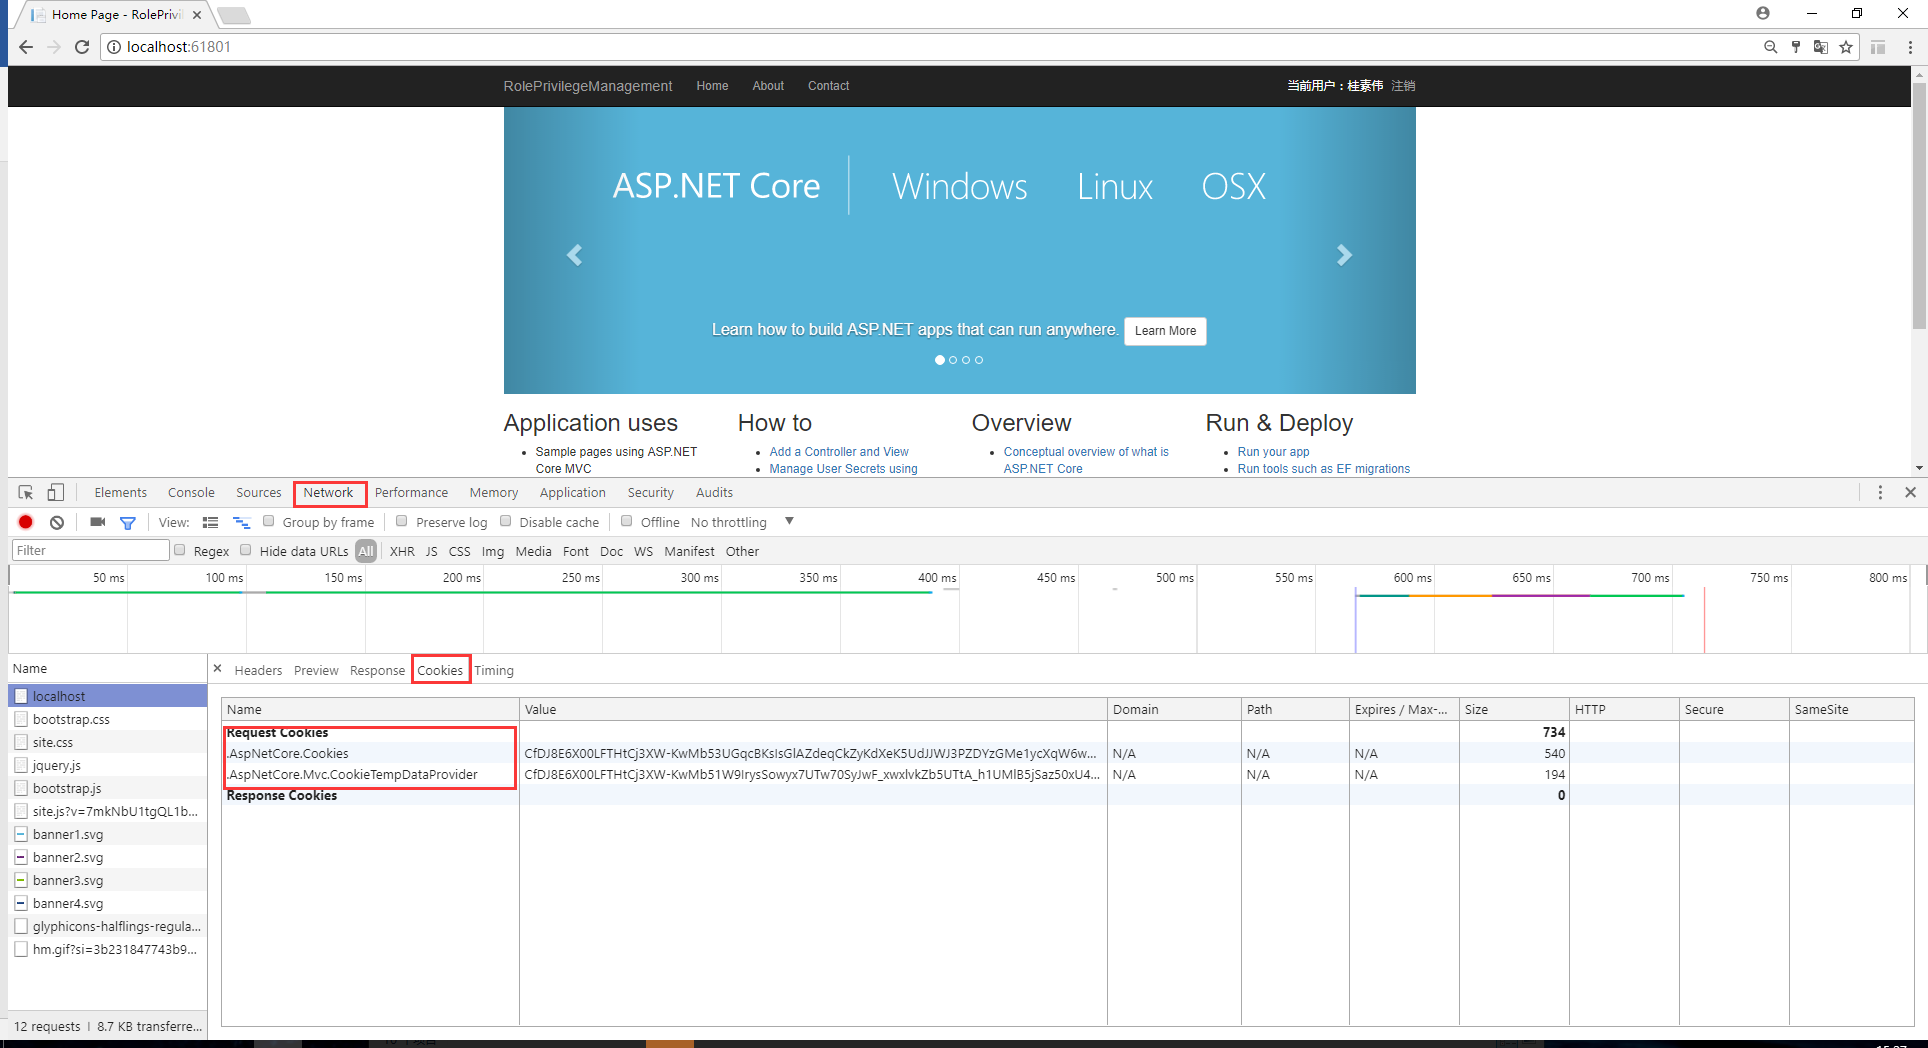
输入用户名,密码登录,再次查看Cookies,发现多了一个.AspNetCore.Cookies,即把用户验证信息加密码保存在了这个Cookie中,当跳转到别的页面时,这两个Cookie会继续在客户端和服务传送,用以验证用户角色。