转自:https://www.cnblogs.com/dongbeifeng/p/authentication-and-authorization-in-aspnet-web-api.html
定义
身份验证(Authentication):确定用户是谁。
授权(Authorization):确定用户能做什么,不能做什么。
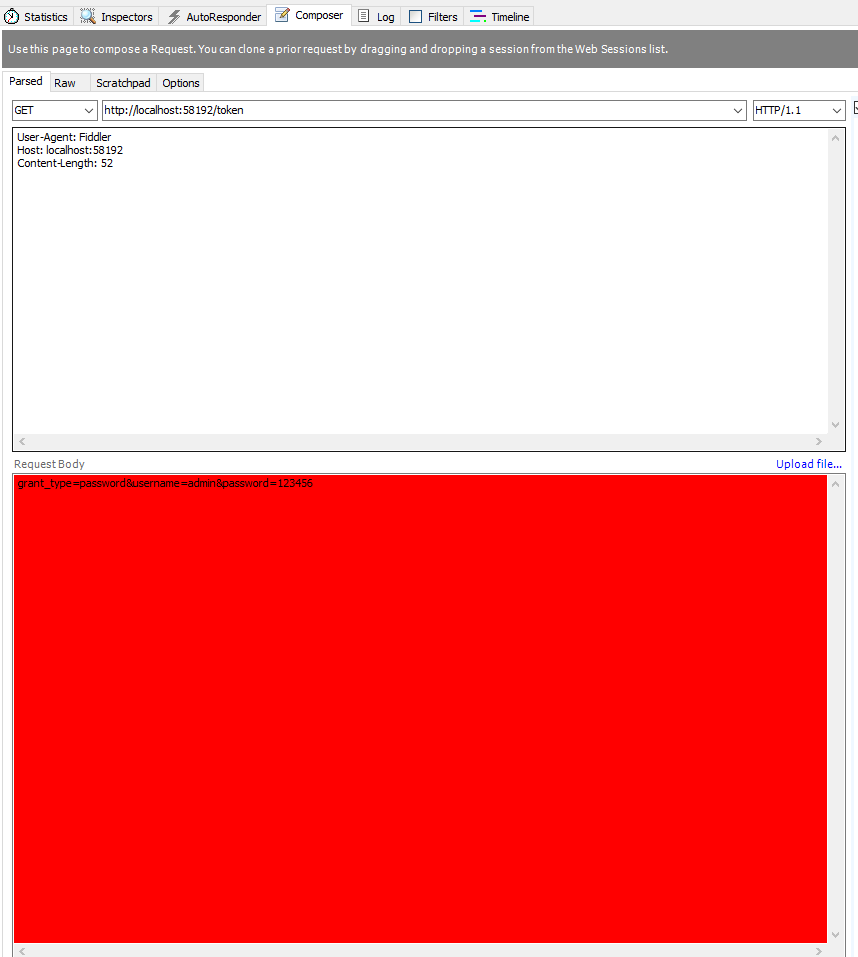
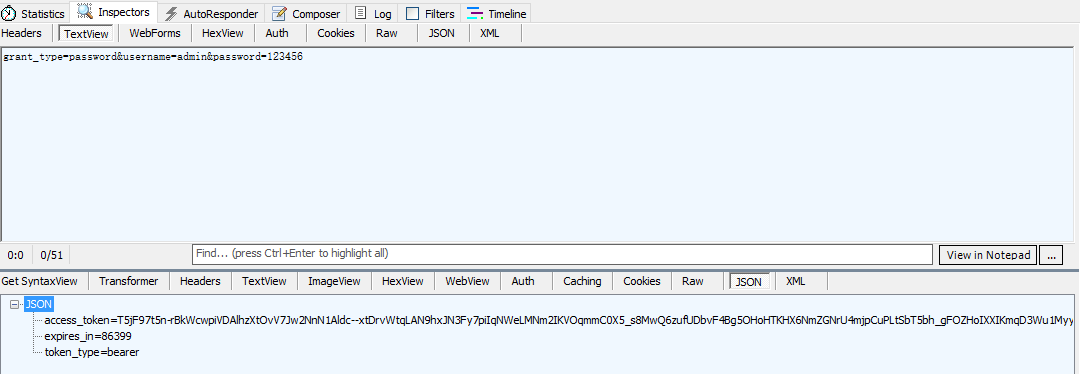
身份验证
WebApi 假定身份验证发生在宿主程序称中。对于 web-hosting,宿主是 IIS。这种情况下使用 HTTP Module 进行验证。
验证时,宿主会创建一个表示安全上下文的主体对象(实现 IPrincipal),将它附加到当前线程。主体对象包含一个存储用户信息的 Identity 对象。若验证成功,Identity.IsAuthenticated 属性将返回 true。
HTTP 消息处理程序(HTTP Message Handler)
可以用 HTTP 消息处理程序代替宿主进行身份验证。这种情况下,由 HTTP 消息处理程序检查请求并设置主体对象。
请考虑以下事项决定是否使用消息处理程序进行身份验证:
- HTTP 模块检查所有经过 asp.net 管道的请求,消息处理程序只检查路由到 WebAPI的请求。
- 可以为每个路由单独设置消息处理程序。
- HTTP 模块仅在 IIS 中可用。消息处理程序则与宿主无关,在 web-hosting 和 self-hosting 中均可用。
- HTTP 模块参与IIS 日志和审计等功能。
- HTTP模块在管道之前运行,主体在消息处理程序运行之前不会设置,当响应离开 消息处理程序时,主体会恢复成原来的那个。 一般来说,不需要自承载时,HTTP 模块较好。
设置主体
进行自定义身份验证时,应在两个地方设置主体对象:
- Thread.CurrentPrincipal,这是 .net 中设置线程主体的标准方式。
- HttpContext.Current.User 这是特定于 ASP.NET 的属性。 采用 web-hosting 时,必须同时设置两处,避免安全上下文不一致。对于 self-hosting,HttpContext.Current 为 null,所以设置之前应进行检查。
1
2
3
4
5
6
7
8
private void SetPrincipal(IPrincipal principal)
{
Thread.CurrentPrincipal = principal;
if (HttpContext.Current != null)
{
HttpContext.Current.User = principal;
}
}
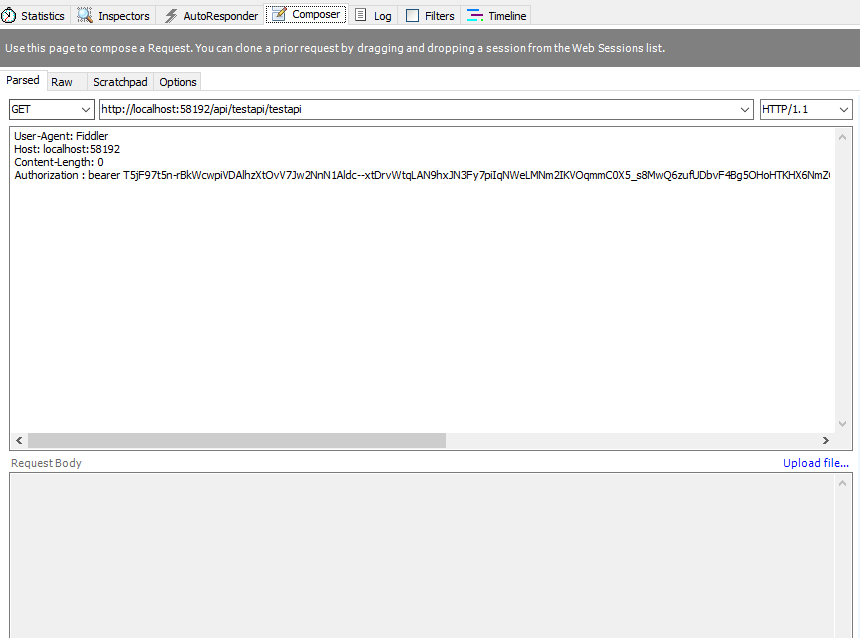
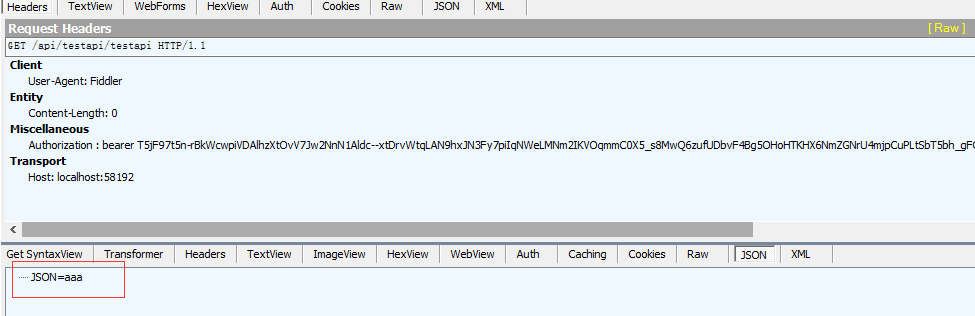
授权
授权发生在管道中更接近 controller 的位置。
- 授权筛选器(Authorization filter)在 action 之前运行。若请求未授权,返回错误,action 不运行。
- 在 action 内部,可以用 ApiController.User 属性获取主体对象,做进一步的控制。
[Authorize] 属性
AuthorizeAttribute 是内置的授权筛选器。用户未通过身份验证时,它返回 HTTP 401 状态码。可以在全局,控制和 action 三个级别应用它。
在全局级别应用:
1 | public static void Register(HttpConfiguration config) |
在控制器级别应用:
1 | [Authorize] |
在 Action 级别应用:
1 | public class ValuesController : ApiController |
在控制器上应用 [Authorize] 时,可以在 Action 上应用 [AllowAnonymous] 取消对某个 Action 的授权要求。上面的代码可以改成下面的形式:
1 | [Authorize] |
指定用户和角色进行限制:
1 | // 按用户限制访问 |
用于 WebAPI 的 AuthorizeAttribute 位于 System.Web.Http 命名空间。在 System.Web.Mvc 命名空间中有一个同名属性,不可用于 WebAPI。
自定义授权筛选器
可从以下类型派生自定义授权筛选器
- AuthorizeAttribute,基于用户和角色进行授权。
- AuthorizationFilterAttribute,不基于用户和角色的同步授权。
- IAuthorizationFilter,实现此接口执行异步授权逻辑。例如,授权逻辑中有对 IO 或网络的异步调用。(CPU-bound的授权逻辑更适合从 AuthorizationFilterAttribute 派生,这样不必写异步方法)。 下图是 AuthorizeAttribute 类层次
在 Action 中执行验证
可在控制器中检查 ApiController.User 属性,根据用户和角色使用不同的逻辑。
1 | public HttpResponseMessage Get() |