深度优先

这个家伙好懒,除了文章什么都没留下

0%

网上看到的都是.net core mvc和webapi使用log4net的例子,很少看到控制台的

1.安装log4net

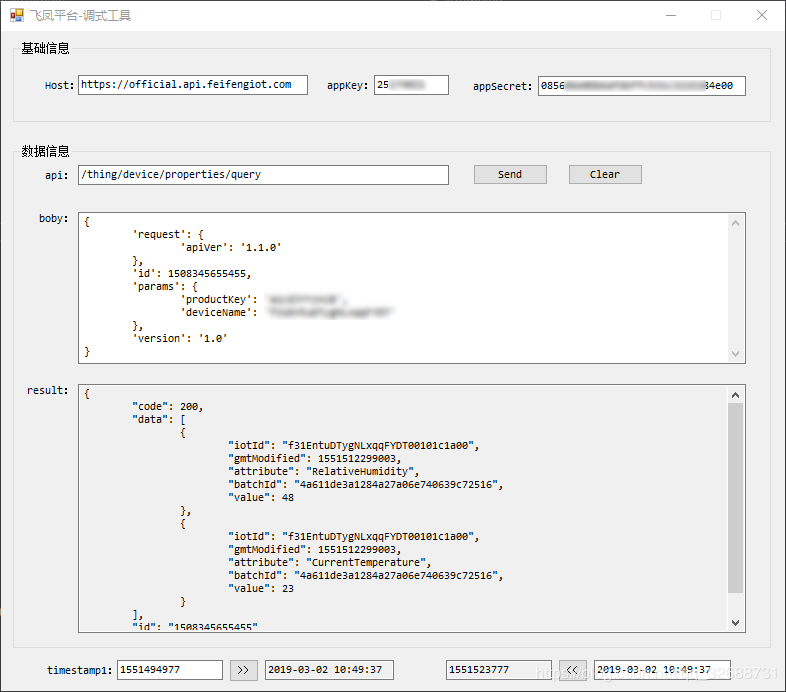
建立.NET Core工程 - 右键 - 管理NuGet程序包 - 搜索log4net - 安装。

2.日志输出到控制台

1
2
3
4
5
6
7
8
9
10
11
12
13
14
15
16
17
18
19
20
21
22
using log4net;
using log4net.Config;
using log4net.Repository;
using System;

namespace LogTest
{
class Program
{
static void Main(string[] args)
{
ILoggerRepository repository = LogManager.CreateRepository("NETCoreRepository");
BasicConfigurator.Configure(repository);
ILog log = LogManager.GetLogger(repository.Name, "NETCorelog4net");

log.Info("NETCorelog4net log");
log.Error("error");
log.Warn("warn");
Console.ReadKey();
}
}
}

3.日志输出到文件

添加配置文件config.xml(右键 - 属性 - 复制到输出目录 - 始终复制),文件的内容如下:

1
2
3
4
5
6
7
8
9
10
11
12
13
14
15
16
17
18
19
20
21
22
23
24
25
26
27
28
29
30
31
32
33
34
35
36
37
38
39
<?xml version="1.0" encoding="utf-8" ?>
<configuration>
<!-- This section contains the log4net configuration settings -->
<log4net>
<appender name="ConsoleAppender" type="log4net.Appender.ConsoleAppender">
<layout type="log4net.Layout.PatternLayout" value="%date [%thread] %-5level %logger - %message%newline" />
</appender>

<appender name="FileAppender" type="log4net.Appender.FileAppender">
<file value="log-file.log" />
<appendToFile value="true" />
<layout type="log4net.Layout.PatternLayout">
<conversionPattern value="%date [%thread] %-5level %logger [%property{NDC}] - %message%newline" />
</layout>
</appender>

<appender name="RollingLogFileAppender" type="log4net.Appender.RollingFileAppender">
<file value="logfile/" />
<appendToFile value="true" />
<rollingStyle value="Composite" />
<staticLogFileName value="false" />
<datePattern value="yyyyMMdd'.log'" />
<maxSizeRollBackups value="10" />
<maximumFileSize value="1MB" />
<layout type="log4net.Layout.PatternLayout">
<conversionPattern value="%date [%thread] %-5level %logger [%property{NDC}] - %message%newline" />
</layout>
</appender>

<!-- Setup the root category, add the appenders and set the default level -->
<root>
<level value="ALL" />
<appender-ref ref="ConsoleAppender" />
<appender-ref ref="FileAppender" />
<appender-ref ref="RollingLogFileAppender" />
</root>

</log4net>
</configuration>
1
2
3
4
5
6
7
8
9
10
11
12
13
14
15
16
17
18
19
20
21
22
23
using log4net;
using log4net.Config;
using log4net.Repository;
using System;
using System.IO;

namespace LogTest
{
class Program
{
static void Main(string[] args)
{
ILoggerRepository repository = LogManager.CreateRepository("NETCoreRepository");
XmlConfigurator.Configure(repository, new FileInfo("config.xml"));
ILog log = LogManager.GetLogger(repository.Name, "NETCorelog4net");

log.Info("NETCorelog4net log");
log.Error("error");
log.Warn("warn");
Console.ReadKey();
}
}
}

控制台的输出如下:

另外,生成一个文件夹logfile和一个以运行时的日期命名的文件20181025.log(配置文件中指定)。

转自:https://blog.csdn.net/liyazhen2011/article/details/83382221

概述

就像再windows上有计划任务一样,centos7 自然也有计划任务,而且设置更为灵活,好用。再centos7 上可以利用crontab 来执行计划任务, 依赖与 crond 的系统服务,这个服务是系统自带的,可以直接查看状态,启动,停止。

安装 crontabs服务并设置开机自启

yum install crontabs systemctl enable crond (设为开机启动) systemctl start crond(启动crond服务) systemctl status crond (查看状态)

设置用户自定义定时任务

vi /etc/crontab
可以看到:
`Example of job definition:
.—————- minute (0 - 59)
| .————- hour (0 - 23)
| | .———- day of month (1 - 31)
| | | .——- month (1 - 12) OR jan,feb,mar,apr …
| | | | .—- day of week (0 - 6) (Sunday=0 or 7) OR sun,mon,tue,wed,thu,fri,sat
| | | | |

          • user-name command to be executed `
1
2
3
4
5
6
7
8
9
10
11
12
13
14
15
16
SHELL=/bin/bash
PATH=/sbin:/bin:/usr/sbin:/usr/bin
MAILTO=root

# For details see man 4 crontabs

# Example of job definition:
# .---------------- minute (0 - 59)
# | .------------- hour (0 - 23)
# | | .---------- day of month (1 - 31)
# | | | .------- month (1 - 12) OR jan,feb,mar,apr ...
# | | | | .---- day of week (0 - 6) (Sunday=0 or 7) OR sun,mon,tue,wed,thu,fri,sat
# | | | | |
# * * * * * user-name command to be executed

0 1 * * * root /root/crontab/dataCrawl.sh

即:
分钟(0-59) 小时(0-23) 日(1-31) 月(11-12) 星期(0-6,0表示周日) 用户名 要执行的命令

  • */30 * * * root /usr/local/mycommand.sh (每天,每30分钟执行一次 mycommand命令)

  • * 3 * * * root /usr/local/mycommand.sh (每天凌晨三点,执行命令脚本,PS:这里由于第一个的分钟没有设置,那么就会每天凌晨3点的每分钟都执行一次命令)

  • 0 3 * * * root /usr/local/mycommand.sh (这样就是每天凌晨三点整执行一次命令脚本)

  • */10 11-13 * * * root /usr/local/mycommand.sh (每天11点到13点之间,每10分钟执行一次命令脚本,这一种用法也很常用)

  • 10-30 * * * * root /usr/local/mycommand.sh (每小时的10-30分钟,每分钟执行一次命令脚本,共执行20次)

  • 10,30 * * * * * root /usr/local/mycommand.sh (每小时的10,30分钟,分别执行一次命令脚本,共执行2次)

保存生效

加载任务,使之生效: crontab /etc/crontab

查看任务: crontab -l
$ crontab -u 用户名 -l (列出用户的定时任务列表)

PS:特别注意,crond的任务计划, 有并不会调用用户设置的环境变量,它有自己的环境变量,当你用到一些命令时,比如mysqldump等需要环境变量的命令,手工执行脚本时是正常的,但用crond执行的时候就会不行,这时你要么写完整的绝对路径,要么将环境变量添加到 /etc/crontab 中。

好了,计划任务就是这么简单了,但是计划任务,执行的语句如果是多条,则需要用药shell脚本,自己先写一个shell脚本,然后在计划任务中,执行这个脚本即可。至于shell脚本的写法, 这里不赘述。

第一个shell脚本

打开文本编辑器(可以使用 vi/vim 命令来创建文件),新建一个文件 test.sh,扩展名为 sh(sh代表shell),扩展名并不影响脚本执行,见名知意就好,如果你用 php 写 shell 脚本,扩展名就用 php 好了。

输入一些代码,第一行一般是这样:

实例

1
2
#!/bin/bash
echo "Hello World !"

#! 是一个约定的标记,它告诉系统这个脚本需要什么解释器来执行,即使用哪一种 Shell。

echo 命令用于向窗口输出文本。

运行 Shell 脚本有两种方法:

1、作为可执行程序

将上面的代码保存为 test.sh,并 cd 到相应目录:

1
2
chmod +x ./test.sh  #使脚本具有执行权限
./test.sh #执行脚本

注意,一定要写成 ./test.sh,而不是 test.sh,运行其它二进制的程序也一样,直接写 test.sh,linux 系统会去 PATH 里寻找有没有叫 test.sh 的,而只有 /bin, /sbin, /usr/bin,/usr/sbin 等在 PATH 里,你的当前目录通常不在 PATH 里,所以写成 test.sh 是会找不到命令的,要用 ./test.sh 告诉系统说,就在当前目录找。

栗子:

1
2
3
4
#!/bin/bash
cd /root/crontabs/FeiFengDataToMySql/
echo pwd
dotnet FeiFengDataToMySql.dll
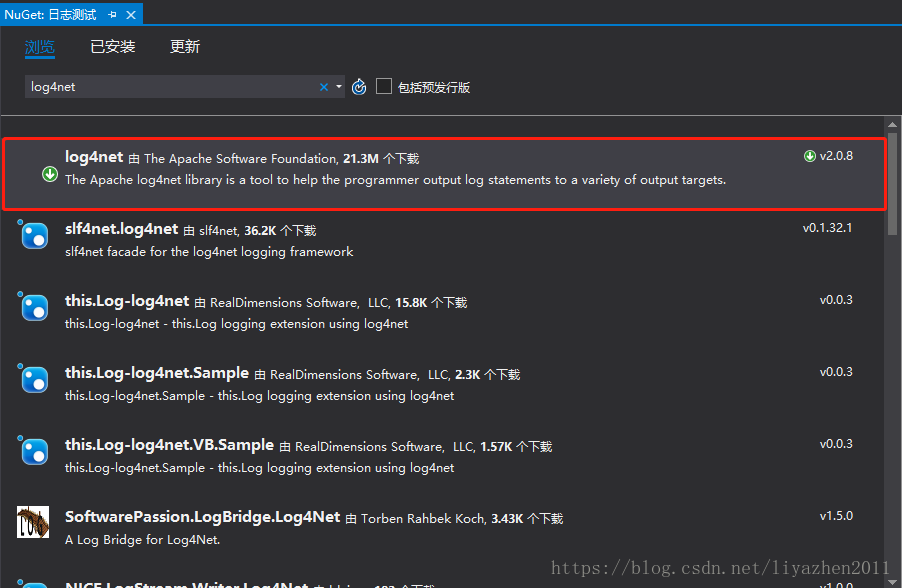
由于需要经常调用飞凤平台上的各种接口,为了方便调试接口写了个小程序:

有两个功能:格式化json代码,编辑json时自动补全tab键

飞凤平台api:http://develop.feifengiot.com/docCenter#/apiDetail/132/1968

代码很简单:

1
2
3
4
5
6
7
8
9
10
11
12
13
14
15
16
17
18
19
20
21
22
23
24
25
26
27
28
29
30
31
32
33
34
35
36
37
38
39
40
41
42
43
44
45
46
47
48
49
50
51
52
53
54
55
56
57
58
59
60
61
62
63
64
65
66
67
68
69
70
71
72
73
74
75
76
77
78
79
80
81
82
83
84
85
86
87
88
89
90
91
92
93
94
95
96
97
98
99
100
101
102
103
104
105
106
107
108
109
110
111
112
113
114
115
116
117
118
119
120
121
122
123
124
125
126
127
128
129
130
131
132
133
134
135
136
137
138
139
140
141
142
143
144
145
146
147
148
149
150
151
152
153
154
155
156
157
158
159
using System;
using System.Collections.Generic;
using System.ComponentModel;
using System.Data;
using System.Drawing;
using System.IO;
using System.Linq;
using System.Net;
using System.Text;
using System.Threading.Tasks;
using System.Windows.Forms;

using aliyun_api_gateway_sdk.Constant;
using aliyun_api_gateway_sdk.Util;
using Newtonsoft.Json;

namespace FeiFengTools
{
public partial class frmMain : Form
{
public frmMain()
{
InitializeComponent();
}

private void Form1_Load(object sender, EventArgs e)
{
this.txtBody.Focus();
}


private string ConvertJsonString(string str)
{
//格式化json字符串
JsonSerializer serializer = new JsonSerializer();
TextReader tr = new StringReader(str);
JsonTextReader jtr = new JsonTextReader(tr);
object obj = serializer.Deserialize(jtr);
if (obj != null)
{
StringWriter textWriter = new StringWriter();
JsonTextWriter jsonWriter = new JsonTextWriter(textWriter)
{
Formatting = Formatting.Indented,
Indentation = 1,
IndentChar = '\t'
};
serializer.Serialize(jsonWriter, obj);
return textWriter.ToString();
}
else
{
return str;
}
}

private void btnSend_Click(object sender, EventArgs e)
{
String bobyContent = this.txtBody.Text;
String path = this.txtApi.Text;
String appKey = this.txtAppkey.Text;
String appSecret = this.txtAppSecret.Text;
String host = this.txtHost.Text;

Dictionary<String, String> headers = new Dictionary<string, string>();
Dictionary<String, String> querys = new Dictionary<string, string>();
Dictionary<String, String> bodys = new Dictionary<string, string>();
List<String> signHeader = new List<String>();

//设定Content-Type,根据服务器端接受的值来设置¸
headers.Add(HttpHeader.HTTP_HEADER_CONTENT_TYPE, ContentType.CONTENT_TYPE_STREAM);
//设定Accept,根据服务器端接受的值来设置
headers.Add(HttpHeader.HTTP_HEADER_ACCEPT, ContentType.CONTENT_TYPE_JSON);

//注意:如果有非Form形式数据(body中只有value,没有key);如果body中是key/value形式数据,不要指定此行
headers.Add(HttpHeader.HTTP_HEADER_CONTENT_MD5, MessageDigestUtil.Base64AndMD5(Encoding.UTF8.GetBytes(bobyContent)));

//注意:业务body部分
bodys.Add("", bobyContent);

//指定参与签名的header
signHeader.Add(SystemHeader.X_CA_TIMESTAMP);

using (HttpWebResponse response = HttpUtil.HttpPost(host, path, appKey, appSecret, 30000, headers, querys, bodys, signHeader))
{
Stream st = response.GetResponseStream();
StreamReader reader = new StreamReader(st, Encoding.GetEncoding("utf-8"));
// 通过reader.ReadToEnd获取返回结果,正常情况下结果是一个json string

//Console.WriteLine(reader.ReadToEnd());

this.txtResult.Text = ConvertJsonString(reader.ReadToEnd());
}
}

private void btnClear_Click(object sender, EventArgs e)
{
this.txtResult.Text = string.Empty;
}

private void txtBody_KeyUp(object sender, KeyEventArgs e)
{
if (e.KeyCode == Keys.Control || e.KeyCode == Keys.Enter)
{
int totalline = txtBody.GetLineFromCharIndex(txtBody.Text.Length) + 1;
int index = txtBody.GetFirstCharIndexOfCurrentLine();
int line = txtBody.GetLineFromCharIndex(index) + 1;
string strLine = txtBody.Lines[line -2];

string insertString = string.Empty;
int n = 0;
while (strLine.IndexOf("\t") == 0)
{
insertString += "\t";
strLine = strLine.Remove(0,1);
n++;
}

int idx = txtBody.SelectionStart;
txtBody.Text = txtBody.Text.Insert(txtBody.SelectionStart, insertString);
txtBody.SelectionStart = idx + n;
txtBody.Focus();
}
}

private void btnTimesToDate_Click(object sender, EventArgs e)
{
try
{

//DateTime dateTimeStart = DateTime.Parse("1970/1/1 08:00");
//timesTamp = timesTamp / 1000;
//return dateTimeStart.AddSeconds(timesTamp);

DateTime dateTimeStart = TimeZone.CurrentTimeZone.ToLocalTime(new DateTime(1970, 1, 1));
long lTime = long.Parse(this.timesTamp1.Text.Substring(0,10) + "0000000");
TimeSpan toNow = new TimeSpan(lTime);
this.timesDate1.Text = dateTimeStart.Add(toNow).ToString("yyyy-MM-dd HH:mm:ss");
}
catch (Exception ex)
{
this.timesDate1.Text = ex.Message;
}
}

private void btnDateToTimes_Click(object sender, EventArgs e)
{
try
{
long start = (DateTime.Parse(this.timesDate2.Text).ToUniversalTime().Ticks - 621355968000000000) / 10000;
this.timesTamp2.Text = start.ToString();
}
catch (Exception ex)
{
this.timesDate1.Text = ex.Message;
}
}
}
}